Saturday 15 November 2014

Fairy Magic D Card.


A5 black base card.
On the front i used one of the black background papers from the 8x8
paper kit.
I added a little poem which reads....
Open me carefully & you will see,
It's not just for christmas,
You will remember me!!.
I used a little bit of black ribbon and glued it into a loop and the back of the card &
glued one of the little white roses with the green leaves onto the front 
for the loop to close it.

As you can see it opens into a Fairy Magic 2015 calender !!!

Lelli-Bot Crafts has:

A Website - www.lellibotcrafts.co.uk 


Fairy Magic B Card


8x8 base card.
I matted some textured silver mirri boad onto the base card.
Then one of the 6x6 papers from the kit into the centre.
I attached foam pads to the topper & sentiment and fixed them to some more 
mirri board.
Fixed the feathers into place & made a couple of white bows .
Finished with the gems, butterfly charm & corners.

Fairy Magic2 Card


6x6 base card.
Matted some lilac glitter card then layered with the humming bird
backing paper.
Added the sentiment with foam pads on some lilac glitter card
& fixed onto the card. 
Added little white butterflies on the top corners & a little white 
rose to the corner  of the sentiment.


Friday 14 November 2014

Fairy Magic 7 Card.


Fairy Magic Kit 

Being released on 17th November on Create & Craft at 12pm

6x6 card base.
Folded the front of the card length wise then matted with silver mirro
topped with the black background paper. 
On the base i matted black card and the opposite background paper.
Stuck the topper and sentiment on with foam pads.
Added all embellishments from the kit.


Fairy Magic C Card


Fairy Magic Kit 

Being released on 17th November on Create & Craft at 12pm


8x8 base card.
Matted with black card, layered with silver mirri & the little butterflies from the kit.
I matted the topper with black card then silver mirri onto the centre.
Did the same with the sentiment.
Put a butterfly in each opposite corner . 
Gems from my own stash , i love gems !! not as though would notice !!! 


Lelli-Bot Crafts has:

A Website - www.lellibotcrafts.co.uk 

Fairy Magic B card


Fairy Magic Kit 

Being released on 17th November on Create & Craft at 12pm

 8x8 card base 
Matted some silver card from my own stash, layered with the 6x6 in the kit.
The topper, sentiment & star corners are in the small kit too.
Added all the embellishments from the full works kit.  


Lelli-Bot Crafts has:

A Website - www.lellibotcrafts.co.uk 


Fairy Magic A

Fairy Magic A card

Here is the first card from the new Fairy Magic Kit.
Will be released on 17th November on Create & Craft 

8x8 base card,
 4 triangles in 2 colours, 2 Mirri 2 grey which were put opposite each other. 
Then i criss crossed the silver sequins, put a band of black satin ribbon
around, topped it with the white rope.
All embellishments are from the kit and the 8x8 paper pack.


Lelli-Bot Crafts has:

A Website - www.lellibotcrafts.co.uk 

Friday 17 October 2014

Fantasy Dragons


Fantasy Dragons 
Released on 17th October 2014 on Create & Craft Tv


Tuesday 7 October 2014

Owl together now!!

This is a 6x6 card,

Matted patterned paper onto the base card  before sticking it down fully added the ribbon.
Layered some pink card and put the topper into place.
Made the rosettes in pink card & attached the button,gem & roses,
The sentiment from my own stash cut down to fit in the large button.
All items from the Twit Twoo Range.
 
Lelli-Bot Crafts has:

A Website - www.lellibotcrafts.co.uk 

Owl Easel Card

Base has the starry night paper but before sticking it down i added the ribbons.
I used the embossed star card on the top then put sticky foam pads on the topper.
Finally added the gems,flowers & owl charms.
The other gems were from my own stash.

Lelli-Bot Crafts has:

A Website - www.lellibotcrafts.co.uk 


Yellow Owl

I embossed the owls onto the card then added the yellow ribbons around the edge.
I cut a piece of gold pearlesant card slightly bigger than the topper & stuck it onto the card.
I added foam pads to the topper  & stuck it on.
Added the sentiment & finally the gems,bow & owl charm.

 Lelli-Bot Crafts has:

A Website - www.lellibotcrafts.co.uk 


Owls Birthday Card.

The base card is 8x8.

The star embossed card is from this range used as a matt,
 the ribbon on the bottom was added before sticking it down.
I used some spellbinder dies to shape on of the papers from the kit.
I added sticky foam pads to the topper and sentiment & put onto the card.
Finally i added ribbons & purple gems, the other gems are from my own stash.

 Lelli-Bot Crafts has:

A Website - www.lellibotcrafts.co.uk 


Owl Happy birthday 2

Base card 8x8
For this one i ran it through an embossing folder and matted it onto the card base.
I added sticky foam pads to the topper and sentiment & stuck them onto the card.
Finally i added the embellishments,all embellishments are from the kit except the gems.


 Lelli-Bot Crafts has:

A Website - www.lellibotcrafts.co.uk 


Lets Celebrate 2

Another from the Twit Twoo Range.

The base card is an 8x8.
The embossed card is from Lelli-Bots Crafts too.
I put a length of lilac ribbon down each side then glued the matt  to the base card.
I took a couple of triangle pieces off  a paper in the kit and placed in the centre,
then i cut some lilac card a bit bigger than the topper and glued in place.
I added sticky foam pads to the topper and put in place.
The sentiment is backed with lilac card to match the centre colours.
Finally added all the gems,bows & owl charm to finish,


Lelli-Bot Crafts has:

A Website - www.lellibotcrafts.co.uk 


Lets Celebrate 1

Base card is an 8x8 card.
I matted and layered the pink cards of various shades onto  the base but before sticking it all
down i added pink ribbon across each corner.
The topper had sticky foam pads added and then placed at the centre of the card.
I then glued the roses, buttons & velvet card to finish.

All items are from the Animal Magic Twit Twoo Range.

                                                                          Lelli-Bot Crafts has:

A Website - www.lellibotcrafts.co.uk 
 

Happy Birthday Owl 1


My base card was a 6x6 card
From the Animal Magic Twit Twoo range
I choose my mat layer and slightly cut it down just to leave the edges showing
I found some blue corrugated card which has gone perfect for what i needed!!
I stuck it across the middle of the card then glued some of the blue sequin strip at the top and bottom.
I added sticky foam pads to the topper and sentiment and attached them to the card.
Finally i added the blue hearts in each corner and finished with an owl charm.
All embellishments came from the matching embellishment Twit Twoo pack.


 Lelli-Bot Crafts has:

A Website - www.lellibotcrafts.co.uk 


Tuesday 26 August 2014

Just for you goth1


8 x 8 piece of card
I then made 2 pieces of clear acetate to make a gate fold centre with it.
I used some really strong clear tape to stick it to the white card and the purple card.
I then stuck the purple pearlescent card onto the the white card base.
Next i cut a piece of the black embossed card slightly smaller than the purple card,
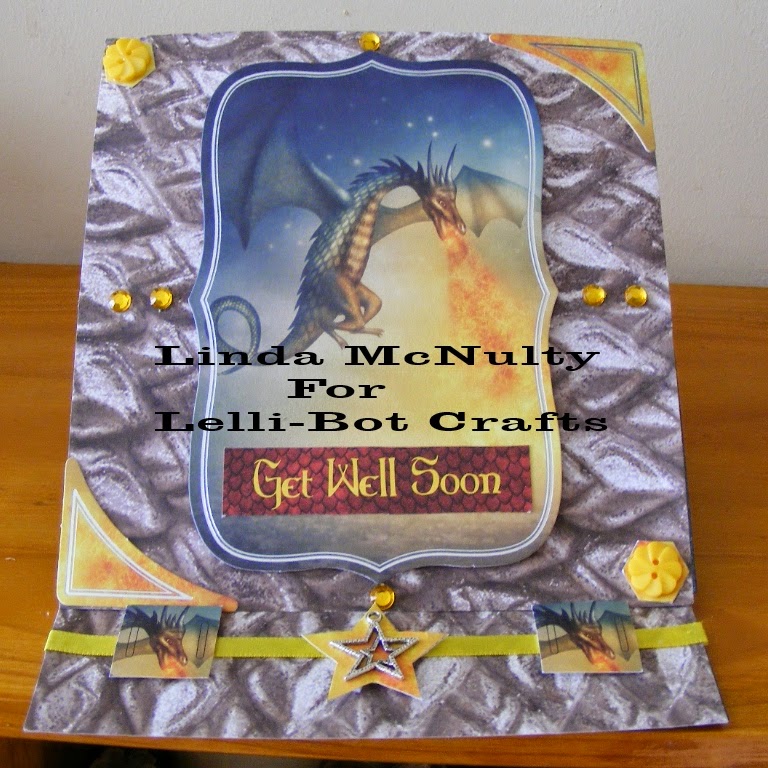
before i stuck this down i added a strip of silver ribbon down the sides & added the charm on a smaller piece of silver ribbon. 
You could if you wanted make a little purple envelope to put underneath it with a silver chain
so the recipient could take the charm off and wear it.
Stick this inside the card leaving a purple edge around all four sides.
Now the fun bit!!! cut a piece of purple card just that little bit bigger of your topper,
i used foam pads on the topper but just before sticking it to the purple card i pierced two
holes on either side of the image and threaded a lilac flower through and left the other end
sticking out of it (made to look if it had a rose through it teeth!!)
I then stuck it half way down the acetate and only on the left had side,
i stuck the sentiment also on the left hand side just underneath it.
Now to the finishing touches!! as you can see i have put lilac gems around the topper, black pearls in the corners & added the gems in a strip down each side.
I just couldn't resist giving it a black velvet tie !!!

You could do this for any occasion just by changing your colours, what a great card 
for a goth valentines day card.  
All items are from the Gothic Grunge range and the card also from Lelli-Bot Crafts
Acetate & gems from my own stash.

  
 Lelli-Bot Crafts has:

A Website - www.lellibotcrafts.co.uk 


Monday 25 August 2014

Radiant Butterfly2

Radiant Butterfly 2


I used 8 x 8 card
I glued some white hammered card as the mat onto my card base.
I layered both the paper and the topper with purple card.
The topper had foam pads put on it to give that stand out look.
Then when all is in place i glued 2 purple velvet bows & 2 white velvet bows
near the points of the card.
Once they had dried i glued the silk flowers onto the centre of the bows.
I then glued the corner pieces on & the little butterflies into place.
Finally i placed a piece of purple card to the back of the sentiment and put onto the card.

All items except the sentiment came from the Radiant Butterflies collection & the embellishment box.